


How to Clean Your Razor in Under 2 Minutes Without Sacrificing Hygiene
Let's be real: you probably spend more time picking out what to watch on Netflix than cleaning your razor. And honestly? We get it. Between work, social plans, and actually remembering to drink water, razor maintenance doesn't exactly top the priority list. But here's the thing—those few extra seconds of TLC for your razor can mean the difference between silky-smooth shaves and that irritating razor burn that shows up at the worst possible time. The good news? A properly clean razor takes less time than brewing your morning coffee, and your skin will absolutely thank you for it.
Why Cleaning Your Razor Actually Matters (Beyond the Obvious)
You know that gunky buildup you sometimes notice between your razor blades? That's not just leftover shaving cream and dead skin cells—it's basically a welcome mat for bacteria. Every time you shave, tiny particles of hair, skin, and product residue get trapped between those blades, creating the perfect environment for bacteria to throw a party.1 And when you use that same razor again without cleaning it? You're potentially introducing all that bacteria back onto freshly shaved skin, which is basically an open invitation for irritation, ingrown hairs, and breakouts.
Plus, there's the practical angle: a clean razor simply works better. When buildup accumulates between the blades, your razor can't glide as smoothly, which means you're more likely to go over the same spot multiple times. That repeated friction? It's a one-way ticket to razor burn city. Keeping your razor clean means each blade can do its job properly, giving you that effortlessly smooth shave without the extra passes that irritate your skin.
The Two-Minute Cleaning Method That Actually Works
Here's your new post-shave routine—we promise it's easier than you think. Right after you finish shaving, hold your razor under hot running water for about 30 seconds. While the water's running, gently tap the razor head against the side of your sink or shower wall. This simple combo of hot water and light tapping dislodges most of the hair and product buildup without any extra tools needed.2
Next, take an old toothbrush (one you're not using anymore, obviously) and gently brush between the blades while continuing to rinse under hot water. Work from the back of the cartridge toward the front, following the direction of the blades. This takes maybe 20 seconds but makes a world of difference in getting out the stubborn bits that water alone might miss. If you used a rich formula like our Fluffy Shave Butter—which won Allure's Best of Beauty Award in 2024 and 2025—you might notice a bit more residue than with foam, but that same toothbrush technique handles it beautifully.
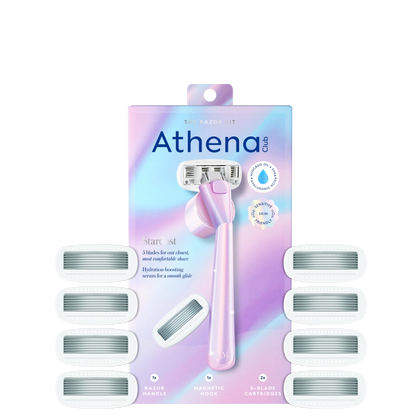
Finally, give your razor one more thorough rinse with hot water, shake off the excess, and store it somewhere it can air dry completely—not in a damp shower caddy or face-down on your tub ledge. If you're using the Razor Kit, the included magnetic storage hook is perfect for this, keeping your razor elevated and dry between uses.
When to Deep Clean (And How to Do It Right)
Even with regular post-shave cleaning, your razor deserves a deeper clean about once a week—think of it as a mini spa day for your favorite shaving tool. For this, you'll want to actually remove the razor cartridge from the handle if possible. Fill a small bowl with equal parts hot water and rubbing alcohol (isopropyl alcohol works great), and let your razor cartridge soak for about 5 minutes.3 The alcohol helps dissolve any stubborn buildup and kills bacteria that regular rinsing might miss.
After soaking, use that trusty toothbrush again to gently scrub between the blades, then rinse everything thoroughly with hot water. For the handle—especially if you're using the premium aluminum handle with non-slip silicone coating from the Athena Club Razor Kit—wipe it down with a cloth dampened with rubbing alcohol. This removes any product residue, body oils, or bacteria that have accumulated on the grip. Let everything air dry completely before reassembling.
One more thing: if you notice rust spots appearing on your blades or the razor starts tugging instead of gliding smoothly, that's your cue to swap in a fresh cartridge. No amount of cleaning can resurrect dull blades, and trying to make them last too long is a recipe for irritation.
What You're Using to Shave Matters for Cleaning
Here's something interesting: what you shave with actually affects how easy your razor is to clean. Traditional shaving foam tends to be lighter and rinses away more easily, but it doesn't always give you the smoothest shave. On the flip side, richer formulas create more glide and protection but can leave a bit more residue.
If you're using something like Glossy Shave Oil—our revolutionary oil-serum hybrid with SKINCLOUD™ technology—you'll notice it actually rinses quite cleanly despite being an oil-based formula. That's because it's designed to work with your razor, not against it. The key is rinsing while the water's still hot, which helps break down any oil residue before it has a chance to solidify between the blades.
Whatever formula you're using, prepping your skin properly makes cleaning easier too. Starting with clean, exfoliated skin means fewer dead skin cells getting trapped in your razor. Try using a gentle exfoliator before shaving—it's one of those small steps that makes everything else easier.
Storage Mistakes That Are Sabotaging Your Clean Razor
You just spent two minutes meticulously cleaning your razor. Amazing! Now don't undo all that work by storing it wrong. The biggest mistake people make? Leaving their razor in the shower where it stays damp and humid—basically a bacterial playground. Even if your razor looks dry on the outside, moisture can linger between those blades, creating the perfect environment for bacteria and even mold to grow.1
Instead, store your razor somewhere with good air circulation where it can dry completely between uses. If you can't bear to take it out of the shower entirely (we understand the convenience factor), at least store it on a magnetic hook or razor stand that keeps the blades elevated and exposed to air. The magnetic hook that comes with the Razor Kit is specifically designed for this—it attaches to your shower wall and keeps your razor perfectly positioned for optimal drying.
And please, never store your razor face-down on any surface or in a closed drawer while it's still damp. You're essentially trapping moisture and bacteria right where you don't want them. Give it a good shake after cleaning, store it upright or elevated, and let gravity and air circulation do their thing.
The Pre-Shave Ritual That Makes Cleaning Easier
Want to know a secret? The easiest way to keep your razor clean is to create less mess in the first place. Before you even pick up your razor, spend an extra 30 seconds preparing your skin. Start with warm water to soften your hair—this alone makes it easier to cut and reduces the amount of tugging that can clog your blades.
If you're someone who loves a shower-to-sink routine, cleansing with a gentle formula like Skin Replenishing Body Wash—which won Elle Magazine Canada's Beauty Grand Prix in 2025—removes oils, dirt, and product buildup before you shave. Clean skin means cleaner blades, which means less scrubbing for you later.
Then, apply your shaving product of choice and let it sit for just a few seconds before starting. This extra moment gives the formula time to further soften the hair, making each stroke cleaner and more efficient. The 5-blade design with spaced-out blades on the Athena Club razor already helps prevent clogging, but giving your shaving product those few seconds to work its magic makes an even bigger difference.
The Bottom Line
- Rinse your razor under hot water immediately after every shave, tapping it gently and using an old toothbrush to clear buildup between blades—total time investment: under 2 minutes
- Deep clean weekly with a rubbing alcohol soak to kill bacteria and dissolve stubborn residue that regular rinsing misses
- Store your razor somewhere with good air circulation where it can dry completely—never face-down or in a damp, enclosed space
- Prep your skin before shaving with warm water and a gentle cleanser to minimize the mess your razor has to handle in the first place
- Replace your blade cartridges regularly because no amount of cleaning can fix dull blades that tug and irritate your skin
Your Razor Deserves a Little Love
Taking care of your razor doesn't have to be another complicated step in an already packed routine. Those two minutes of post-shave cleaning aren't just about hygiene—they're about respecting the tools that help you feel confident and put-together every single day. When you invest in quality products that work hard for your skin, a little maintenance goes a long way in keeping them performing at their best.
Ready to level up your entire shave routine? Check out the Athena Club collection and find your new favorite essentials—from razors designed with your curves in mind to shaving formulas that make every stroke count.
Sources
- American Academy of Dermatology Association. "How to Store Your Razor." Accessed via aad.org
- Mayo Clinic. "Shaving Tips for Healthy Skin." Accessed via mayoclinic.org
- Cleveland Clinic. "Best Practices for Razor Hygiene." Accessed via clevelandclinic.org


