


What's the Correct Way to Dry Your Razor to Prevent Rust and Bacteria
You've probably noticed it before—that weird orange tint on your razor blades, or the slightly funky smell coming from your shower caddy. Not exactly the vibe you're going for during your self-care routine. The truth is, how you dry and store your razor matters way more than you'd think. It's not just about making your blades last longer (though that's definitely a perk). It's about keeping bacteria from throwing a party on your razor and ensuring every shave feels as smooth as the first. Let's dive into the questions you've been wondering about.
Do I really need to dry my razor after every use?
Yes, and here's why it's actually worth those extra ten seconds. When you leave your razor sitting in a puddle of water or hanging out in a steamy shower, you're basically rolling out the welcome mat for rust and bacteria.1 Water trapped between the blades creates the perfect environment for both to thrive. The short answer? A quick shake and proper drying after each shave can literally double the life of your blades while keeping things hygienic. Think of it this way: you wouldn't leave your favorite skincare tool sitting in water, right? Your razor deserves the same treatment. Just a few taps against the shower wall to remove excess water, followed by a gentle pat with a clean towel, makes all the difference.
What's the best way to actually dry my razor?
Honestly, it's simpler than you think. After rinsing your razor thoroughly under running water to remove all the hair and shaving cream residue, give it several firm shakes to fling off the excess water. Then—and this is the key part—pat it dry with a clean towel, paying attention to the area between the blades. Don't wipe the blades directly from front to back because that can dull them faster. Instead, tap the towel against the razor or gently press it between the towel folds. If you're using the Razor Kit, those spaced-out blades make this even easier since water doesn't get as trapped. Finally, store it somewhere dry and well-ventilated—not in a closed drawer or shower caddy where moisture lingers.
Can I just shake the water off and call it a day?
You could, but you'd only be doing half the job. Shaking removes the obvious water droplets, but there's still moisture hiding between those blades and around the cartridge connection. That leftover moisture is exactly what leads to rust spots and bacterial growth over time.2 The thing is, even a small amount of trapped water creates problems when your bathroom stays humid (which, let's be real, most bathrooms do). Taking thirty extra seconds to actually dry your razor with a towel removes that hidden moisture and keeps everything cleaner for longer. It's one of those tiny habits that actually makes a noticeable difference in how your razor performs and how your skin feels after shaving.
Why does my razor get rusty even though I rinse it?
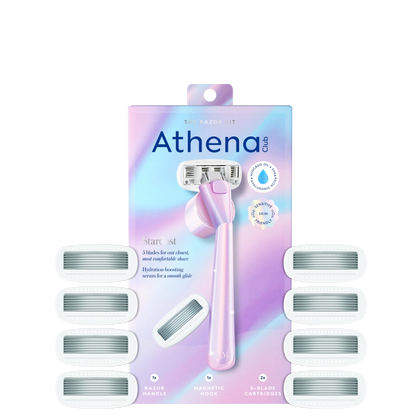
Here's the thing: rinsing is great for removing debris, but it doesn't prevent rust. Rust happens when metal is exposed to both water and oxygen over time, and your bathroom is basically a rust-producing factory with all that humidity.3 Even stainless steel blades can develop rust if they're constantly sitting in moisture. The key word here is "sitting"—it's the prolonged exposure that causes problems. If you're rinsing but then leaving your razor in the shower or on a wet surface, you're not actually solving the moisture issue. The solution is removing that water completely after each use and storing your razor somewhere with good airflow. That magnetic hook that comes with the Razor Kit? It's designed specifically to keep your razor elevated and dry between uses.
How does bacteria actually grow on razors?
Bacteria love warm, moist environments—and your shower checks both boxes. When you shave, you're creating tiny openings in your skin, and any bacteria hanging out on your razor can potentially cause irritation, bumps, or even infections.4 Gross, right? The bacteria come from a combination of sources: dead skin cells that stick to the blades, the natural bacteria on your skin, and the damp bathroom environment where they multiply. The longer your razor stays wet, the more time bacteria have to set up camp. Drying your razor thoroughly after each use disrupts their ideal growing conditions. It's also why you should replace your blades regularly—even with perfect drying habits, blades accumulate bacteria over time that regular rinsing can't fully remove.
Is there a difference between air drying and towel drying?
Both have their place, but towel drying is definitely more effective. Air drying works if you're storing your razor in a spot with excellent ventilation and low humidity—but most bathrooms don't qualify. The problem with relying solely on air drying is that it takes time, and during those hours of drying, your razor is still exposed to bathroom moisture and steam from showers. Towel drying removes the water immediately, giving bacteria and rust way less opportunity to develop. The combo approach works best: pat your razor dry with a clean towel, then store it in a well-ventilated spot where any remaining microscopic moisture can evaporate quickly. Just make sure you're using a clean towel each time, because using a damp or dirty towel defeats the entire purpose.
Where should I actually store my razor to keep it dry?
The worst place is where most people keep theirs: in the shower or on the edge of a wet bathtub. The best storage spot is outside the shower entirely, somewhere with good airflow and low humidity. A bathroom cabinet works if it's not directly above the shower where steam accumulates. A wall-mounted holder in a drier part of your bathroom is even better. If you need to keep it in the shower for convenience, at least use a magnetic hook or holder that keeps the razor elevated and allows water to drain completely—not a cup or enclosed container where moisture pools. The handle should hang downward so gravity helps any trapped water escape from the blade area. Basically, treat your razor like it's allergic to standing water, because functionally, it kind of is.
How often should I replace my razor blades?
Generally, you're looking at every 5-7 shaves, but it really depends on your hair type, how large the area you're shaving is, and how well you maintain your razor between uses. If you're noticing tugging, increased irritation, or your shave just doesn't feel as smooth as it used to, that's your cue to swap in a fresh blade. Proper drying can extend blade life a bit, but there's a limit—blades naturally dull with use. The Razor Kit features a 5-blade design that's been recognized by Good Housekeeping for delivering 89% single-pass shaving, which means less repeated strokes and longer-lasting sharpness. Signs you've waited too long include visible rust, any weird smell, or razor bumps that weren't happening before. When in doubt, fresh blades are always worth it for both hygiene and comfort.
Does using shaving cream or oil affect how I should clean my razor?
Absolutely. Products like Fluffy Shave Butter or Glossy Shave Oil create that gorgeous glide during your shave, but they can also leave residue between the blades if you don't rinse thoroughly. That buildup mixed with moisture creates an even better environment for bacteria. After shaving with any cream, butter, or oil, spend an extra few seconds really rinsing your razor under hot running water, moving it back and forth to flush out anything stuck between the blades. You can even gently tap it against your palm under the water stream to dislodge stubborn bits. Once it's completely clean, then move to your drying routine. The cleaner your razor is before drying, the more effective that drying will be at preventing bacteria growth.
Can I use rubbing alcohol to disinfect my razor?
You can, and it's actually a smart move for an extra layer of cleanliness, especially if you've nicked yourself or if your razor has been sitting unused for a while. After rinsing and drying your razor, you can dip the blade portion in rubbing alcohol (70% isopropyl works great) for about 30 seconds, then let it air dry completely. The alcohol kills bacteria and also helps displace any remaining water, which speeds up drying. Just don't make this your only cleaning method—you still need to rinse off hair and product residue first, because alcohol doesn't remove physical debris. Think of it as an optional bonus step rather than a replacement for proper rinsing and drying. And definitely let the alcohol evaporate completely before your next shave, because nobody wants that stinging sensation on freshly shaved skin.
What about those razor blade sharpeners—do they actually work?
Honestly? They're hit or miss, and they don't address the real issues of rust and bacteria. Most razor blade "sharpeners" are really just ways to remove buildup or realign the blade edge slightly, which might give you one or two extra shaves. But they can't reverse rust, eliminate bacteria that's embedded in microscopic crevices, or restore a truly dull blade. Your time and effort are better spent on proper cleaning, thorough drying, and appropriate storage—those habits will extend blade life more effectively than any gadget. When blades are truly done, they're done, and that's okay. Fresh blades aren't just about sharpness; they're about hygiene too. Instead of trying to resurrect old blades indefinitely, focus on making each set last as long as safely possible through good maintenance practices.
Does the type of razor I use make a difference in how I should dry it?
The basic principles stay the same—remove water, dry thoroughly, store properly—but the design of your razor can make the process easier or harder. Razors with wide spacing between blades, like the Razor Kit, naturally trap less water and hair, which means they're easier to rinse clean and dry faster. Razors with tons of blades packed closely together require more attention to get water out from those tight spaces. The handle material matters too—premium materials like the aluminum handle with silicone coating resist moisture better than plastic that can harbor bacteria in scratches and crevices. Essentially, a well-designed razor doesn't just perform better during the shave; it's also easier to maintain afterward. That said, even the best razor still needs you to actually dry it—the design just makes your job easier.
Quick Answers
- Always dry your razor after every single use—shake off excess water, then pat dry with a clean towel, paying attention to the space between blades
- Store your razor outside the shower in a well-ventilated spot, or use a magnetic hook that keeps it elevated so water drains away completely
- Rinse thoroughly after using any shaving products to remove residue, because buildup plus moisture equals bacteria heaven
- Replace blades every 5-7 shaves or whenever you notice tugging, irritation, or rust—proper drying extends blade life but doesn't make them last forever
- For extra cleanliness, occasionally dip the blade portion in rubbing alcohol after drying, then let it air dry completely before storing
Taking care of your razor isn't complicated, but it does require a tiny bit of intentionality. Those few extra seconds after each shave—the thorough rinse, the proper drying, the smart storage—add up to smoother shaves, healthier skin, and a routine that actually feels good instead of just getting the job done. Your razor is an essential part of your self-care ritual, and treating it right means it'll treat your skin right in return.
Ready to upgrade your self-care routine? Explore the full Athena Club collection and discover what works for you.
Sources
- American Academy of Dermatology Association. "How to Care for Your Razor." AAD.org
- Centers for Disease Control and Prevention. "Moisture and Bacterial Growth." CDC.gov
- International Journal of Cosmetic Science. "Corrosion of Razor Blades in Humid Environments." 2019
- Journal of Clinical Microbiology. "Bacterial Contamination of Personal Care Items." 2020


